Tailwind CSS v4 in a WordPress Plugin: The Standalone CLI Guide

Tailwind CSS v4 introduces significant changes, notably removing the Command Line Interface (CLI) binary from its main npm package. While this streamlines integration with bundlers like Vite, it breaks the classic npx tailwindcss init setup essential for WordPress theme and plugin development.

This guide provides the robust, step-by-step method for installing and running Tailwind CSS v4 inside your WordPress plugin directory on a Linux environment, solving the common issues of the missing CLI and the “unknown utility class” error.


Phase 1: Environment Setup and CLI Acquisition


Since the standard npm install tailwindcss no longer provides the executable, we must download the official Standalone CLI binary.

Step 1: Initialize NPM and Install Dependencies

Navigate to your plugin’s root directory (where your main PHP file resides) and set up the Node environment.

# Navigate to your plugin root
cd /path/to/wp-content/plugins/your-plugin-name

# Initialize project
npm init -y

# Install PostCSS and Autoprefixer (still required)
npm install -D tailwindcss@4 postcss autoprefixer

Step 2: Acquire the Standalone CLI Binary

  1. Create a local directory for the binary:
mkdir -p tailwind-cli
cd tailwind-cli

2. Download the Linux x64 Executable: (Verify the URL for the exact version if needed.)

curl -sLO https://github.com/tailwindlabs/tailwindcss/releases/download/v4.1.16/tailwindcss-linux-x64

3. Rename and Grant Execute Permissions (Critical): This step prevents the Exec format error.

mv tailwindcss-linux-x64 tailwindcss
chmod +x tailwindcss
cd .. # Return to plugin root

Step 3: Create Core Directories

mkdir -p src dist

Phase 2: Configuration and Scripts

Since the init command is removed in v4, we manually create all necessary files.

Continue reading “Tailwind CSS v4 in a WordPress Plugin: The Standalone CLI Guide”

How to Run WordPress Studio on Ubuntu

WordPress Studio, developed by Automattic, is a powerful open-source tool for managing local WordPress development environments. While pre-built binaries exist for macOS and Windows, Linux users must build the app from source. This guide walks you through setting up and running Studio on Ubuntu, including resolving common issues I encountered.

Prerequisites

Before starting, ensure your Ubuntu system is ready with the necessary tools. Open a terminal (Ctrl+Alt+T) and follow these steps.

Step 1: Update Your System

Keep your package lists and software up to date:

sudo apt update && sudo apt upgrade -y

Step 2: Install Git

Git is required to clone the Studio repository. Install it if you haven’t already:

sudo apt install git -y

Step 3: Install Node Version Manager (nvm)

Studio is built using Node.js, and nvm helps manage the specific Node.js version required. Install nvm with:

curl -o- https://raw.githubusercontent.com/nvm-sh/nvm/v0.39.7/install.sh | bash

After installation, reload your shell configuration to make nvm available:

source ~/.bashrc

Verify nvm is installed:

nvm --version

You should see a version number (e.g., 0.39.7). If not, close and reopen your terminal, then try again.

Continue reading “How to Run WordPress Studio on Ubuntu”

How to Install XAMPP in Linux

XAMPP is a popular open-source software stack that provides developers with a convenient solution for setting up a local web server environment. In this blog post, I’ll guide you through the process of installing XAMPP on a Linux system. This will enable you to create a development and testing environment for your web projects.

Step 1: Download XAMPP

Before we begin, make sure to download the XAMPP installer file from the official website. Once downloaded, navigate to the ~/Downloads/ or your downloaded directory using the following command:

cd ~/Downloads/

Step 2: Making XAMPP Installer Executable

To proceed with the installation, it is necessary to make the XAMPP installer file executable. Run the following command to change the file’s execution bits:

sudo chmod 755 xampp-linux-x64-7.4.29-1-installer.run

Step 3: Running the XAMPP Installer

Execute the XAMPP installer file using the following command:

sudo ./xampp-linux-x64-7.4.29-1-installer.run
Continue reading “How to Install XAMPP in Linux”

Installing Composer in a XAMPP Environment on Linux

When you’re working with PHP locally, in an environment such as XAMPP on a Linux operating system, you might need to install Composer. Composer is a tool for dependency management in PHP, allowing you to declare and manage the libraries your project depends on.

The Quick Installation Method

Typically, the quickest way to install Composer on a Linux operating system is through the command line as follows:

sudo apt install composer

This approach might not be appropriate for those who already have XAMPP installed. This is because the command would install PHP system-wide, which is unnecessary here since XAMPP already bundles PHP with its package, making this method redundant in such cases.

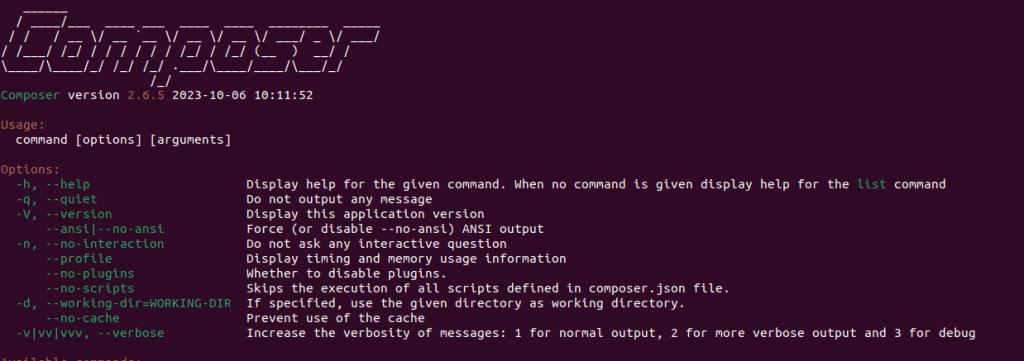
Continue reading “Installing Composer in a XAMPP Environment on Linux”

Using WP-CLI in XAMPP for Linux

WP-CLI or WordPress Command Line Interface is used to manage sites without the need of accessing the website through a browser. Here is a quick instruction on how to install WP-CLI in XAMPP for GNU/Linux.

Getting Started

Download WP-CLI, you can use curl, or wget commands to download the wp-cli.phar file.

$ curl -O https://raw.githubusercontent.com/wp-cli/builds/gh-pages/phar/wp-cli.phar

Or,

$ wget https://raw.githubusercontent.com/wp-cli/builds/gh-pages/phar/wp-cli.phar

Next, is to check whether the downloaded file works or not, by running the following command:

$ php wp-cli.phar --info

You’ll notice the following output:

$ php wp-cli.phar --info
The program 'php' can be found in the following packages:
 * php7.0-cli
 * hhvm
Try: sudo apt install <selected package>

This is due to the missing PHP package, XAMPP is used to ease the installing of such packages for a quick development server setup, installing PHP package isn’t an ideal solution, as XAMPP already includes it. What you need to do is define the PATH variable.

Defining PATH Variable

When you type the following in your shell, you’ll notice your existing path from which the executable files are called:

$ echo $PATH

PATH variable lists all the paths of the executable directory from where the shell will try to execute a particular command.

To add the XAMPPs PHP directory, you’ll need to define the following rules in the .profile file located in your home directory. The rules will be as follows:

Continue reading “Using WP-CLI in XAMPP for Linux”

Translate WordPress to Malayalam

Malayalam fonts transition over the period from ASCII to UNICODE has finally taken on recognizing the language all over the Internet. Much of the credit lies with the Free and Open source communities for their efforts.

Over the years, the influence of other languages somehow found its way into our day-to-day life to such an extent that our native language fades in many sectors, especially in computing.

As more and more Malayalam blogs and thoughts being published using WordPress, people are looking for ways to express, and adapt their native language into the sphere of WordPress.

WordPress Kerala communities aim is to make WordPress available in languages other than English and to encourage native Malayalam speakers to volunteer, contribute and help make WordPress part of our vocabulary.

Why translate WordPress?
WordPress is a free software. It could act as a platform to bridge a gap between tech savvy to those who don’t speak English, or someone who just prefers their native language.

What do I need to know?
Skills you need to know are fluency in both English and Malayalam. The key is to translate organically and not to structure each word or string as it is.

Getting started – contributing:
1) Log in to the Malayalam translation website: https://translate.wordpress.org/locale/ml/default/wp and select any set/subproject that grabs your attention and translate.

2) After you make your suggested translated strings, a translation editor will then accept or reject these suggestion.

2) After you make your suggested translated strings, a translation editor will then accept or reject these suggestion.

More info :
Translator’s Handbook: https://make.wordpress.org/polyglots/handbook/
Translation Team: https://make.wordpress.org/polyglots/teams/?locale=ml_IN

Global Translation Day

Excited, and happy to take part in co-organizing Global Translation Day. April 24th, it’s a day which marks a 24-hour translation sprint all over the globe, starting from the East and ends in most Western parts of the world. The idea is to get people involved into translating WordPress in their local language.

Being part of the WordPress Kochi community, we have been working towards the goal of bringing WordPress part of our Malayalam vocabulary. We are very glad on how things turned up, and the tremendous amount of participation, and contribution from Kochi WordPress lovers.